250312 OpenGL学习记录
前言
寒假期间看了这个视频,被带着敲了一遍代码,这才有了“确实了解了一点OpenGL”的实感。
有些事情不上手去做,很难有底气断言“我已经掌握了/它很简单”
甚至有时候就算实际做过了某件事,也不能笃定自己对它知根知底。这篇分享对于我来说大概就算这样的东西。
我在那段时间学到的大概有:
- C++面向对象编程
- 对shader与glsl的一些基本了解
- OpenGL常用API
这篇分享的内容大部分都是代码,偏向于记录性质,把上面那个视频十多小时的内容摘取出来了一部分。
环境与依赖
新建项目
VS2022创建C++空项目
项目下新建三个文件夹:
- src:存放源代码
- main.cpp
- res:存放资源文件
- 3rdparty:存放第三方库
GLFW
Download->64-bit Windows binaries
在3rdparty下新建文件夹GLFW,将解压后的include与lib-vc2022文件夹复制到3rdparty/GLFW下
由于不使用dll,删除3rdparty/GLFW/lib-vc2022下的glfw3.dll与glfw3dll.lib
Documentation->将Example code复制到main.cpp中
此时这段代码看起来非常喜庆:
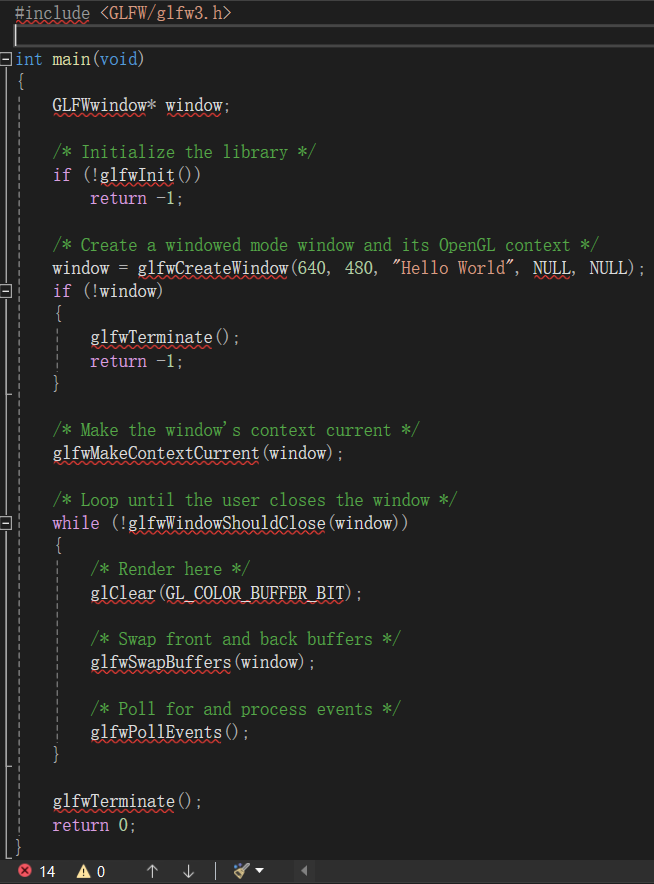
右键单击项目->属性->配置属性->C/C++->常规->附加包含目录->输入src;3rdparty/GLFW/include
链接失败
配置属性->链接器->常规->附加库目录->输入3rdparty\GLFW\lib-vc2022
链接器->输入->附加依赖项->添加OpenGL32.lib;glfw3.lib;glfw3_mt.lib;
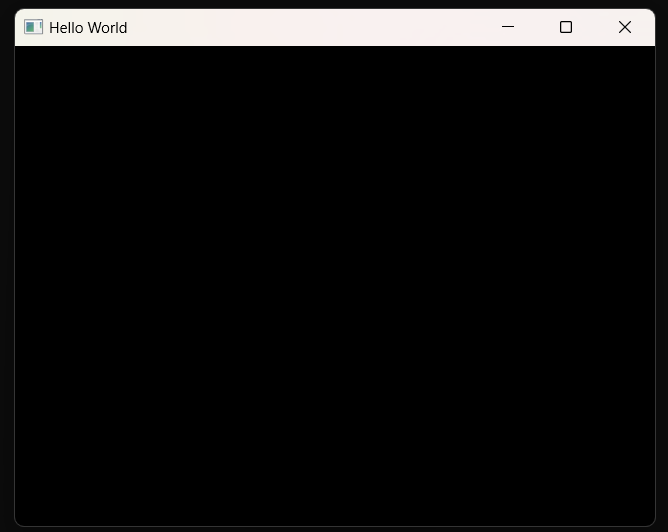
再次运行,此时应该可以看到这样的界面:
GLEW
Downloads->Binaries
直接把解压后的文件夹扔进3rdparty文件夹中,将它重命名为GLEW
右键单击项目->属性->配置属性->C/C++->常规->附加包含目录->添加3rdparty/GLEW/include
配置属性->链接器->常规->附加库目录->添加3rdparty\GLEW\lib\Release\x64
链接器->输入->附加依赖项->添加glew32s.lib
C/C++->预处理器->预处理器定义->添加GLEW_STATIC
对代码进行一点改动:
#include <GL/glew.h>
#include <GLFW/glfw3.h>

#include <iostream>

int main(void)
{
    GLFWwindow* window;

    /* Initialize the library */
    if (!glfwInit())
        return -1;

    // 设置OpenGL版本
    glfwWindowHint(GLFW_CONTEXT_VERSION_MAJOR, 3);
    glfwWindowHint(GLFW_CONTEXT_VERSION_MINOR, 3);
    glfwWindowHint(GLFW_OPENGL_PROFILE, GLFW_OPENGL_CORE_PROFILE);

    /* Create a windowed mode window and its OpenGL context */
    window = glfwCreateWindow(640, 480, "Hello World", NULL, NULL);
    if (!window)
    {
        glfwTerminate();
        return -1;
    }

    /* Make the window's context current */
    glfwMakeContextCurrent(window);

    glfwSwapInterval(1); // 设置刷新速率

    if (glewInit() != GLEW_OK) // 初始化GLEW
        std::cout << "ERROR!" << std::endl;

    std::cout << glGetString(GL_VERSION) << std::endl; // 打印OpenGL版本以便调试

    glEnable(GL_DEPTH_TEST); // 开启深度测试
    glEnable(GL_BLEND); // 开启混合
    glBlendFunc(GL_SRC_ALPHA, GL_ONE_MINUS_SRC_ALPHA);
    // 前者是原颜色比重,后者是目标颜色比重
    // 若前者a = 0.8,后者a = 0.4,则最终颜色从前者取0.8,后者取0.6

    /* Loop until the user closes the window */
    while (!glfwWindowShouldClose(window))
    {
        /* Render here */
        glClear(GL_COLOR_BUFFER_BIT | GL_DEPTH_BUFFER_BIT); // 追加清理深度缓冲

        /* Swap front and back buffers */
        glfwSwapBuffers(window);

        /* Poll for and process events */
        glfwPollEvents();
    }

    glfwTerminate();
    return 0;
}
画一个三角形

顶点信息
假设红色边框是窗口范围,那么上下左右分别为(0, 1)(0, -1)(-1, 0)(1, 0)
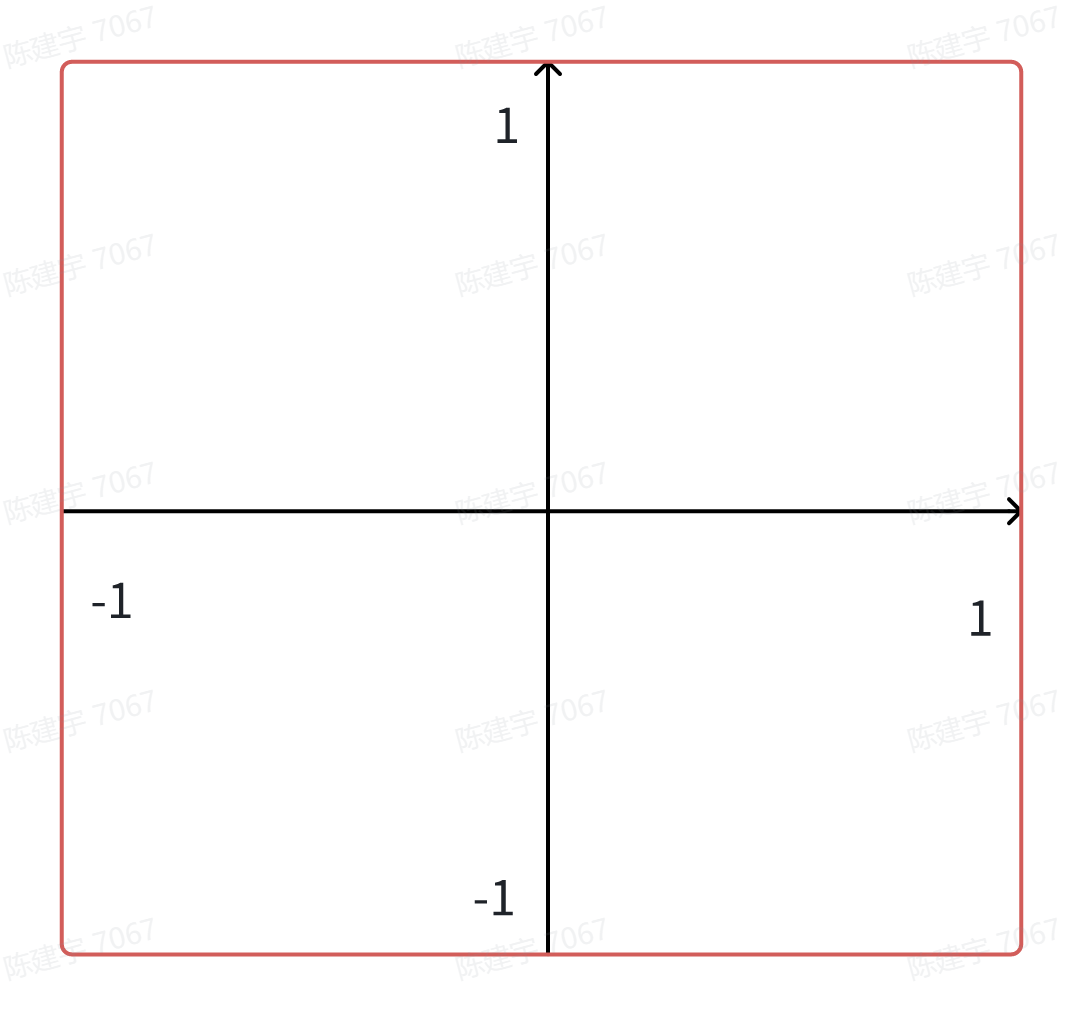
故在初始化完毕,绘制开始前,设置如下三个顶点:
// ...
std::cout << glGetString(GL_VERSION) << std::endl; // 打印OpenGL版本以便调试

float vertex[] = {
    -0.5f,  0.5f
    -0.5f, -0.5f
     0.5f, -0.5f
}; // x, y

/* Loop until the user closes the window */
while (!glfwWindowShouldClose(window))
// ...
rgb范围通常设置在[0, 1]内,对应[0, 255]。为了绘制一个kirakiradokidoki的三角形,我们给顶点添加上rgb:
float vertex[] = {
    -0.5f,  0.5f, 1, 0, 0,
    -0.5f, -0.5f, 0, 1, 0,
     0.5f, -0.5f, 0, 0, 1,
}; // x, y, r, g, b
顶点缓冲区
我们需要让显卡拿到这些数据
unsigned int vbo; // vertex buffer object
glGenBuffers(1, &vbo); // 申请一个缓冲区,获取它的句柄
glBindBuffer(GL_ARRAY_BUFFER, vbo); // 声明这个缓冲区为ARRAY_BUFFER
/* 将vertex中的数据传到缓冲区,并且提示这个缓冲区的用法为STATIC_DRAW
相应的,这个用法还有DYNAMIC_DRAW与STREAM_DRAW,用法可参考下面的官方文档 */
glBufferData(GL_ARRAY_BUFFER, sizeof(vertex), vertex, GL_STATIC_DRAW);
STREAM You should use STREAM_DRAW when the data store contents will be modified once and used at most a few times.
STATIC Use STATIC_DRAW when the data store contents will be modified once and used many times.
DYNAMIC Use DYNAMIC_DRAW when the data store contents will be modified repeatedly and used many times.
顶点数组缓冲区
虽然我们知道每个顶点有五个float数据,前两个对应位置,后三个对应rgb,但是显卡不知道。所以我们需要告诉显卡这个数据如何布局。
unsigned int vao; // vertex array object
glGenVertexArrays(1, &vao); // 申请一个顶点数组,获取它的句柄
glBindVertexArray(vao); // 将opengl的数组缓冲区绑定上这个数组缓冲区
接下来有两个重要函数:
- glEnableVertexAttribArray(GLuint index)
- index:激活第几组数据
- glVertexAttribPointer(GLuint index, GLint size, GLenum type, GLboolean normalized, GLsizei stride, const void * pointer)
- index: 设置第几组数据
- size:该组包含几个数据
- type:数据类型
- normalized:是否归一化
For **
glVertexAttribPointer**, specifies whether fixed-point data values should be normalized (GL_TRUE) or converted directly as fixed-point values (GL_FALSE) when they are accessed - stride:步长,一个顶点包含多少字节数据
- pointer:这组数据的第一个字节是这个顶点数据的第几个字节
Specifies a offset of the first component of the first generic vertex attribute in the array in the data store of the buffer currently bound to the
GL_ARRAY_BUFFERtarget. The initial value is 0.
GL开头的那些类型基本只是些类型别名,并且可以往往可以一眼看出来,例如GLuint对应unsigned int。
对于我们x, y, r, g, b的布局,可以按照如下方式设置:
glEnableVertexAttribArray(0);
glVertexAttribPointer(0, 2, GL_FLOAT, GL_FALSE, 5 * 4, 0);
glEnableVertexAttribArray(1);
glVertexAttribPointer(1, 3, GL_FLOAT, GL_FALSE, 5 * 4, (const void*)8);
索引信息
试想我们要画的不止一个三角形,而是两个三角形构成的矩形,那么我们是否需要设置6个顶点共6*5*4=120字节的数据?
可以,但没必要,我们可以设置4个顶点6个索引共4*5*4+6*4=104字节的数据。随着三角形数量增多,优化效果会越来越明显。
以我们要画的三角形为例,这个三角形使用第0,1,2个顶点,故索引如下:
unsigned int index[] = {
    0, 1, 2,
};
索引缓冲区
基本可类比顶点缓冲区
unsigned int ibo;
glGenBuffers(1, &ibo);
glBindBuffer(GL_ELEMENT_ARRAY_BUFFER, ibo);
glBufferData(GL_ELEMENT_ARRAY_BUFFER, sizeof(index), index, GL_STATIC_DRAW);
Shader
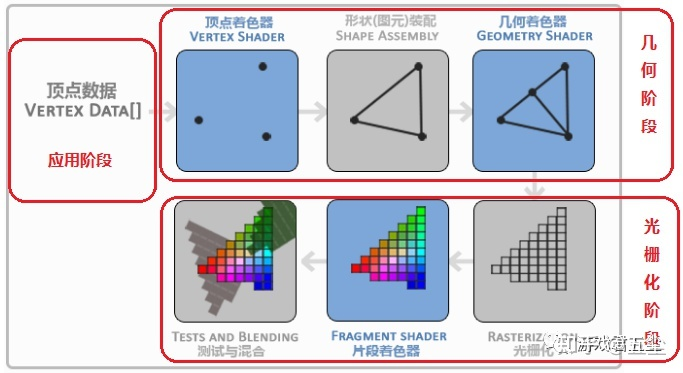
这里我们的重点是Vertex Shader与Fragment Shader。
- Vertex Shader
#version 330 core // 目标版本 layout(location = 0) in vec4 position; // 第0组顶点信息(位置) layout(location = 1) in vec4 color; // 第1组顶点信息(颜色) // 缺失的位数自动补1, 如传入(0.5, 0.5, 0.5)会变成(0.5, 0.5, 0.5, 1.0) out vec4 v_Color; // 传给fragment shader void main(){ gl_Position = position; // glsl语法 v_Color = color; } - Fragment Shader
#version 330 core

in vec4 v_Color; // 从vertex shader获取

out vec4 o; // 该点输出到屏幕上的颜色

void main(){
    o = v_Color;
}
为了便于组织,我们将两份shader放进一个文件中,命名为Basic.shader。
新建res/shaders文件夹,将Basic.shader置于其下。
#shader vert // 这不是glsl的语法,这只是便于自己处理文本识别Shader类型
#version 330 core

layout(location = 0) in vec4 position;
layout(location = 1) in vec4 color;

out vec4 v_Color;

void main(){
    gl_Position = position;
    v_Color = color;
}

#shader frag
#version 330 core

in vec4 v_Color;

out vec4 o;

void main(){
    o = v_Color;
}
文件读取
添加头文件
#include <fstream>
#include <sstream>
这里主要是要认出自己写的#shader vert/frag
struct ShaderProgramSource {
    std::string Vert;
    std::string Frag;
};

ShaderProgramSource ParseShader(const std::string& path) {
    std::ifstream fs(path);
    std::stringstream ss[2];
    enum { None = -1, Vert = 0, Frag = 1 }type = None;
    std::string line;
    while (getline(fs, line))
        if (line.find("#shader") != std::string::npos)
            if (line.find("vert") != std::string::npos) type = Vert;
            else if (line.find("frag") != std::string::npos) type = Frag;
            else type = None;
        else ss[(int)type] << line << '\n';
    return { ss[0].str(),ss[1].str() };
}
使用Shader
- 编译
unsigned int CompileShader(unsigned int type, const std::string& source) { unsigned int id = glCreateShader(type); // 创建vertex/fragment(由type参数决定) shader,获取句柄 const char* src = source.c_str(); // 传参用 glShaderSource(id, 1, &src, nullptr); // 为创建的shader填充一份内容 glCompileShader(id); // 编译shader int result; glGetShaderiv(id, GL_COMPILE_STATUS, &result); // 获取shader编译状态 if (result == GL_FALSE) { int length; glGetShaderiv(id, GL_INFO_LOG_LENGTH, &length); // 获取报错信息长度 char* message = (char*)alloca(length * sizeof(char)); // 在栈上申请一个char数组,用于接收报错信息,其实这里可以在堆上申请 glGetShaderInfoLog(id, length, &length, message); // 获取报错信息 std::cout << "Fail to compile " << (type == GL_VERTEX_SHADER ? "vertex" : "fragment") << "shader!" << std::endl << message << std::endl; glDeleteShader(id); // 删除shader释放空间 return 0; } return id; } - 创建
unsigned int CreateShader(const std::string& vertexShader, const std::string& fragmentShader) {
    unsigned int program = glCreateProgram(); // 创建shader程序
    unsigned int vs = CompileShader(GL_VERTEX_SHADER, vertexShader);
    unsigned int fs = CompileShader(GL_FRAGMENT_SHADER, fragmentShader);

    glAttachShader(program, vs); // 为这段程序添加vertex shader
    glAttachShader(program, fs); // 为这段程序添加fragment shader
    glLinkProgram(program); // 链接程序,这玩意这么C里C气的
    glValidateProgram(program); // 检验这段程序是否能在当前环境运行,其实不写也行

    // 删除shader释放空间
    glDeleteShader(vs);
    glDeleteShader(fs);

    return program;
}
在main函数中调用这些方法
ShaderProgramSource source(ParseShader("res/shaders/Basic.shader"));
unsigned int shader = CreateShader(source.Vert, source.Frag);
绘制
做了那么多准备,我们终于可以开始绘制了!
这一步其实很简单,只需要在while循环里添加一段代码:
// ...
/* Render here */
glClear(GL_COLOR_BUFFER_BIT | GL_DEPTH_BUFFER_BIT);

glUseProgram(shader); // 指定使用的shader程序
glBindVertexArray(vao); // 绑定顶点数组
glBindBuffer(GL_ELEMENT_ARRAY_BUFFER, ibo); // 绑定索引缓冲区
glDrawElements(GL_TRIANGLES, sizeof(index) / 4, GL_UNSIGNED_INT, nullptr);
// 绘制,这就是我们常说的draw call

/* Swap front and back buffers */
glfwSwapBuffers(window);
// ...
glDrawElements(GLenum mode, GLsizei count, GLenum type, const void * indices)
- mode:指定画什么
- count:索引数
- type:索引缓冲区数据类型
- indices:疑似索引缓冲区偏置,可参考
glVertexAttribPointer的pointer参数
如果没出意外的话,运行程序,你已经可以绘制一个三角形了!
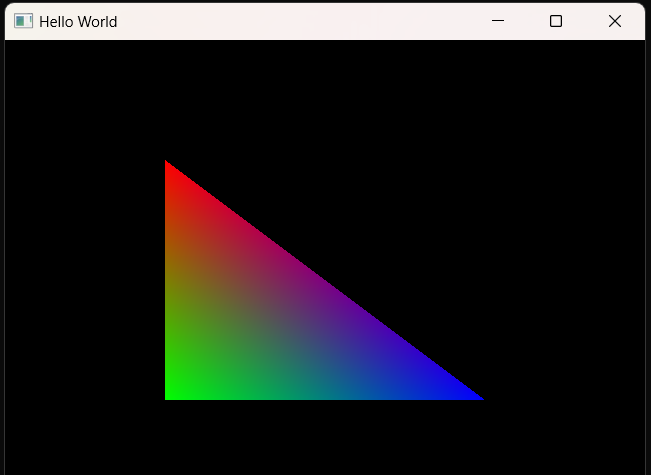
让三角形动起来
想要让三角形动起来,我们可以每一帧修改一次顶点缓冲区的数据,但这样实在有点麻烦。有没有更加简单高效的实现方法呢?
有的兄弟,有的,这样的方法多得数不清。记得Unity里面,我们可以通过Shader.PropertyToId(string)获取shader中一个属性的id,再通过Material.SetXXX(int, ...)修改这个属性的值;这里也有对应的方法。
首先在Basic.shader中设置uniform变量:
#shader vert
#version 330 core

layout(location = 0) in vec4 position;
layout(location = 1) in vec4 color;

uniform vec2 u_Offset;

out vec4 v_Color;

void main(){
        gl_Position = position + vec4(u_Offset, 0, 0);
        v_Color = color;
}
// ...
然后在main函数的while循环里改动这个变量:
// ...
glDrawElements(GL_TRIANGLES, ib.GetCount(), GL_UNSIGNED_INT, 0);

static float offset = 0, increment = 0.02f;
// static修饰符保证仅初始化这一次。主要还是为了演示才这么做,正常写建议放循环前面去
offset += increment;
if (offset > 0.5f || offset < -0.5f) increment = -increment;

static int offsetLocation = glGetUniformLocation(shader, "u_Offset"); // 获取id
glUniform2f(offsetLocation , offset, 0); // 设置变量

/* Swap front and back buffers */
glfwSwapBuffers(window);
// ...
现在这个三角形学会反复横跳了!
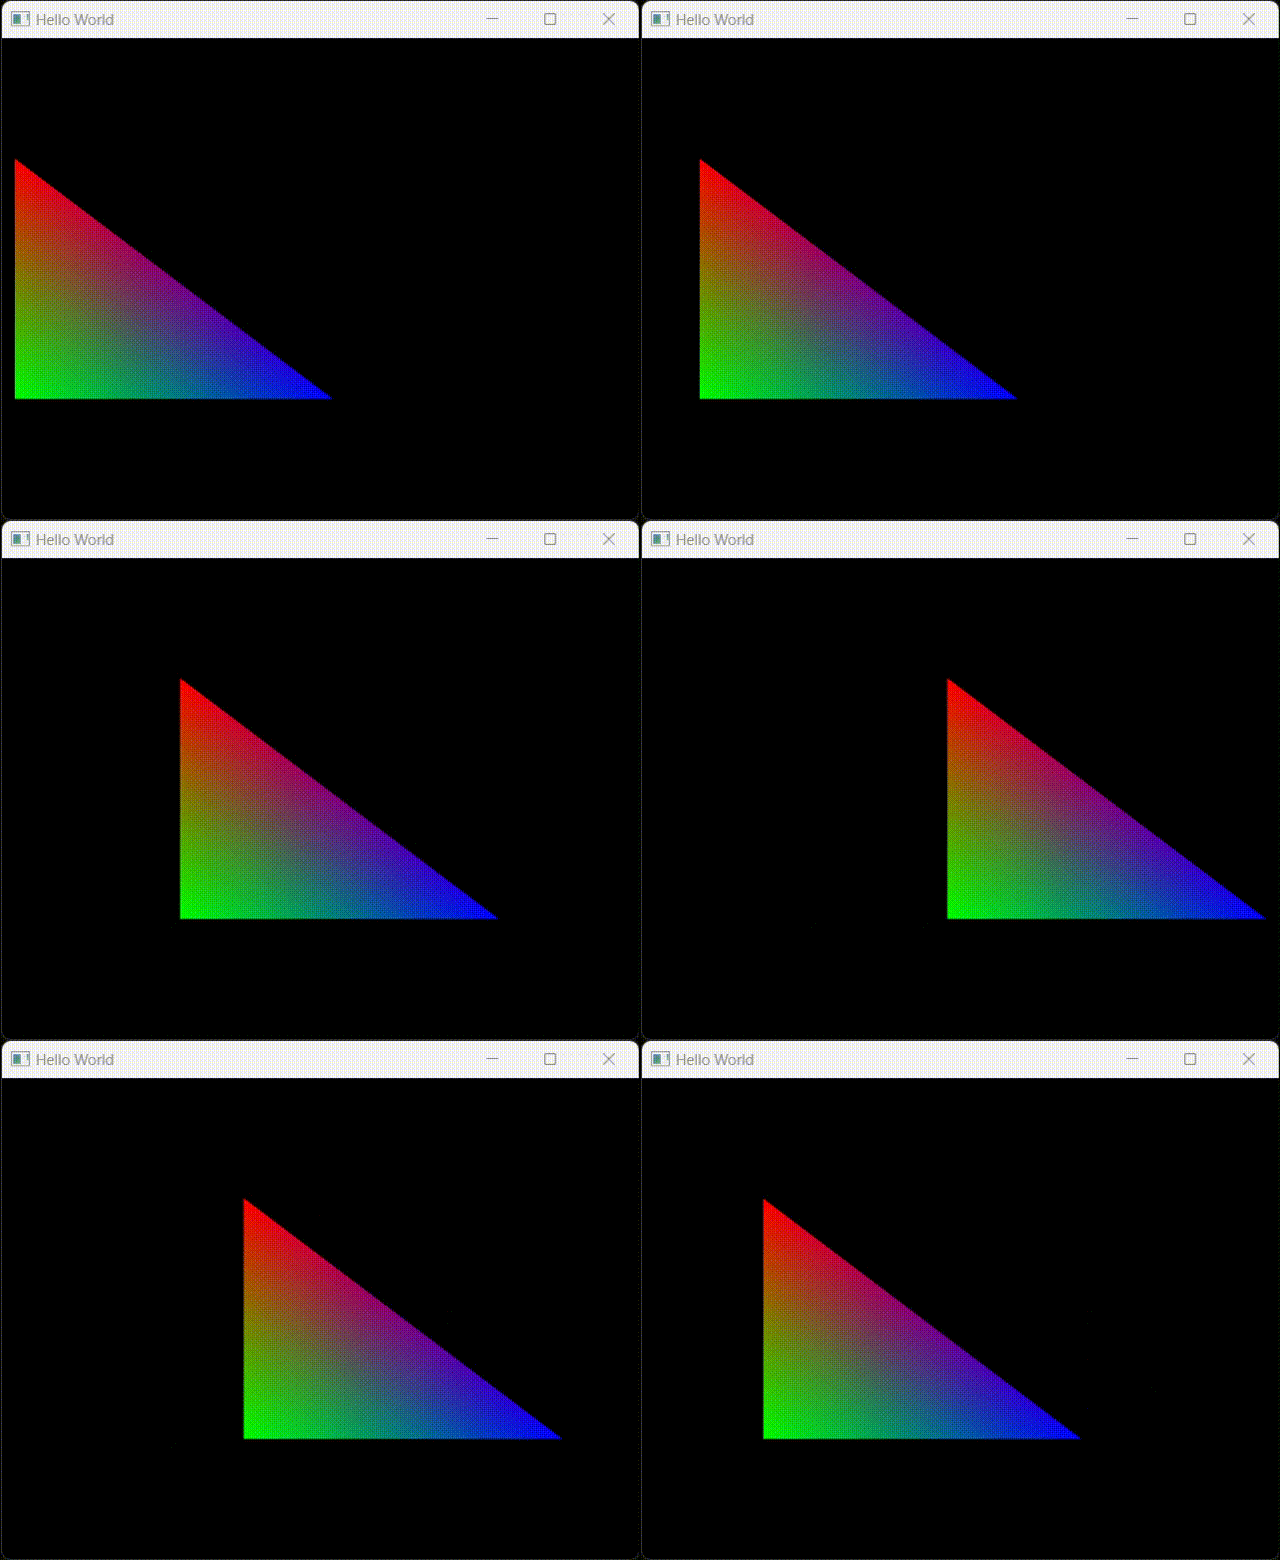
代码参考如下:
#include <GL/glew.h>
#include <GLFW/glfw3.h>

#include <iostream>
#include <fstream>
#include <sstream>

struct ShaderProgramSource {
    std::string Vert;
    std::string Frag;
};

ShaderProgramSource ParseShader(const std::string& path) {
    std::ifstream fs(path);
    std::stringstream ss[2];
    enum { None = -1, Vert = 0, Frag = 1 }type = None;
    std::string line;
    while (getline(fs, line))
        if (line.find("#shader") != std::string::npos)
            if (line.find("vert") != std::string::npos) type = Vert;
            else if (line.find("frag") != std::string::npos) type = Frag;
            else type = None;
        else ss[(int)type] << line << '\n';
    return { ss[0].str(),ss[1].str() };
}

unsigned int CompileShader(unsigned int type, const std::string& source) {
    unsigned int id = glCreateShader(type);
    const char* src = source.c_str();
    glShaderSource(id, 1, &src, nullptr);
    glCompileShader(id);

    int result;
    glGetShaderiv(id, GL_COMPILE_STATUS, &result);
    if (result == GL_FALSE) {
        int length;
        glGetShaderiv(id, GL_INFO_LOG_LENGTH, &length);
        char* message = (char*)alloca(length * sizeof(char));
        glGetShaderInfoLog(id, length, &length, message);
        std::cout << "Fail to compile " <<
            (type == GL_VERTEX_SHADER ? "vertex" : "fragment")
            << "shader!" << std::endl << message << std::endl;
        glDeleteShader(id);
        return 0;
    }

    return id;
}

unsigned int CreateShader(const std::string& vertexShader, const std::string& fragmentShader) {
    unsigned int program = glCreateProgram();
    unsigned int vs = CompileShader(GL_VERTEX_SHADER, vertexShader);
    unsigned int fs = CompileShader(GL_FRAGMENT_SHADER, fragmentShader);

    glAttachShader(program, vs);
    glAttachShader(program, fs);
    glLinkProgram(program);
    glValidateProgram(program);

    glDeleteShader(vs);
    glDeleteShader(fs);

    return program;
}

int main(void)
{
    GLFWwindow* window;

    /* Initialize the library */
    if (!glfwInit())
            return -1;

    // 设置OpenGL版本
    glfwWindowHint(GLFW_CONTEXT_VERSION_MAJOR, 3);
    glfwWindowHint(GLFW_CONTEXT_VERSION_MINOR, 3);
    glfwWindowHint(GLFW_OPENGL_PROFILE, GLFW_OPENGL_CORE_PROFILE);

    /* Create a windowed mode window and its OpenGL context */
    window = glfwCreateWindow(640, 480, "Hello World", NULL, NULL);
    if (!window)
    {
        glfwTerminate();
        return -1;
    }

    /* Make the window's context current */
    glfwMakeContextCurrent(window);

    glEnable(GL_DEPTH_TEST);
    glEnable(GL_BLEND);
    glBlendFunc(GL_SRC_ALPHA, GL_ONE_MINUS_SRC_ALPHA);

    glfwSwapInterval(1); // 设置刷新速率

    if (glewInit() != GLEW_OK) // 初始化GLEW
        std::cout << "ERROR!" << std::endl;

    std::cout << glGetString(GL_VERSION) << std::endl; // 打印OpenGL版本以便调试

    float vertex[] = {
        -0.5f,  0.5f, 1, 0, 0,
        -0.5f, -0.5f, 0, 1, 0,
         0.5f, -0.5f, 0, 0, 1,
    }; // x, y, r, g, b
    unsigned int vbo;
    glGenBuffers(1, &vbo);
    glBindBuffer(GL_ARRAY_BUFFER, vbo);
    glBufferData(GL_ARRAY_BUFFER, sizeof(vertex), vertex, GL_STATIC_DRAW);

    unsigned int vao;
    glGenVertexArrays(1, &vao);
    glBindVertexArray(vao);

    glEnableVertexAttribArray(0);
    glVertexAttribPointer(0, 2, GL_FLOAT, GL_FALSE, 5 * 4, 0);
    glEnableVertexAttribArray(1);
    glVertexAttribPointer(1, 3, GL_FLOAT, GL_FALSE, 5 * 4, (const void*)8);

    unsigned int index[] = {
        0, 1, 2,
    };
    unsigned int ibo;
    glGenBuffers(1, &ibo);
    glBindBuffer(GL_ELEMENT_ARRAY_BUFFER, ibo);
    glBufferData(GL_ELEMENT_ARRAY_BUFFER, sizeof(index), index, GL_STATIC_DRAW);

    ShaderProgramSource source(ParseShader("res/shaders/Basic.shader"));
    unsigned int shader = CreateShader(source.Vert, source.Frag);

    /* Loop until the user closes the window */
    while (!glfwWindowShouldClose(window))
    {
        /* Render here */
        glClear(GL_COLOR_BUFFER_BIT | GL_DEPTH_BUFFER_BIT);

        glUseProgram(shader);
        glBindVertexArray(vao);
        glBindBuffer(GL_ELEMENT_ARRAY_BUFFER, ibo);
        glDrawElements(GL_TRIANGLES, sizeof(index) / 4, GL_UNSIGNED_INT, 0);

        static float offset = 0, increment = 0.02f;
        offset += increment;
        if (offset > 0.5f || offset < -0.5f) increment = -increment;

        static int location = glGetUniformLocation(shader, "u_Offset");
        glUniform2f(location, offset, 0);

        /* Swap front and back buffers */
        glfwSwapBuffers(window);

        /* Poll for and process events */
        glfwPollEvents();
    }

    glfwTerminate();
    return 0;
}
封装
为了便于复用,提升可读性,我们可以将这些代码封装起来。
IndexBuffer
在src文件夹下创建IndexBuffer类(IndexBuffer.cpp&IndexBuffer.h)
注意到我们在创建索引缓冲区和绘制三角形时均调用了相关api,故提取出构造函数和Bind两个方法;顺道把Unbind也一块儿写了,还要记得析构防止内存泄漏;draw call需要知道索引数,故应该对外暴露Count属性。
.h
#pragma once
class IndexBuffer
{
private:
    unsigned int m_RendererID;
    unsigned int m_Count;
    unsigned int m_Usage;
public:
    IndexBuffer(const unsigned int* data, unsigned int count, unsigned int usage);
    ~IndexBuffer();

    void Bind() const;
    void Unbind() const;

    inline unsigned int GetCount() const { return m_Count; }
    // 与第6行结合起来看,其实就是C#里面的public uint Count { get; private set; }
};
.cpp
#include "IndexBuffer.h"

#include <GL/glew.h>
#include <GLFW/glfw3.h>

IndexBuffer::IndexBuffer(const unsigned int* data, unsigned int count, unsigned int usage)
    :m_Count(count), m_Usage(usage)
{
    glGenBuffers(1, &m_RendererID);
    Bind();
    glBufferData(GL_ELEMENT_ARRAY_BUFFER, count * sizeof(unsigned int), data, usage);
}

IndexBuffer::~IndexBuffer()
{
    glDeleteBuffers(1, &m_RendererID);
}

void IndexBuffer::Bind() const
{
    glBindBuffer(GL_ELEMENT_ARRAY_BUFFER, m_RendererID);
}

void IndexBuffer::Unbind() const
{
    glBindBuffer(GL_ELEMENT_ARRAY_BUFFER, 0);
}
VertexBuffer
在src文件夹下创建VertexBuffer类(VertexBuffer.cpp&VertexBuffer.h)
大致可参照IndexBuffer,甚至由于无需暴露m_Count,工作量还要小一些;然而配套工作不少。
.h
#pragma once
class VertexBuffer
{
private:
    unsigned int m_RendererID;
    unsigned int m_Usage;
public:
    VertexBuffer(const void* data, unsigned int size, unsigned int usage);
    ~VertexBuffer();

    void Bind() const;
    void Unbind() const;
};
.cpp
#include "VertexBuffer.h"

#include <GL/glew.h>
#include <GLFW/glfw3.h>

VertexBuffer::VertexBuffer(const void* data, unsigned int size, unsigned int usage)
    :m_Usage(usage)
{
    glGenBuffers(1, &m_RendererID);
    Bind();
    glBufferData(GL_ARRAY_BUFFER, size, data, usage);
}

VertexBuffer::~VertexBuffer()
{
    glDeleteBuffers(1, &m_RendererID);
}

void VertexBuffer::Bind() const
{
    glBindBuffer(GL_ARRAY_BUFFER, m_RendererID);
}

void VertexBuffer::Unbind() const
{
    glBindBuffer(GL_ARRAY_BUFFER, 0);
}
VertexArray
在src文件夹下创建VertexArray类(VertexArray.cpp&VertexArray.h)
它的构造、析构、绑定、解绑均可参照VertexBuffer
#pragma once
class VertexArray
{
private:
    unsigned int m_RendererID;
public:
    VertexArray();
    ~VertexArray();

    void Bind() const;
    void Unbind() const;
};
然而要描述顶点的内存布局,我们还需要一点额外的工作
以一开始的vertex数组为例,它的内存布局大概可以这么划分:
接下来就让我们把这段零散的布局组织起来吧!
Layout&Element
在src文件夹下创建VertexBufferLayout.cpp&VertexBufferLayout.h
由于VertexBufferElement内容并不多,可以将它写在刚刚创建的两个文件中
.h
#pragma once

#include <vector>

struct VertexBufferElement {
    unsigned int type, count;
    unsigned char normalized;
    // 以上均与glVertexAttribPointer方法中的参数对应

    static unsigned int GetSizeOfType(unsigned int type);
    // 像sizeof一样获取GLenum的大小
};

class VertexBufferLayout
{
private:
    std::vector<VertexBufferElement> m_Elements;
    unsigned int m_Stride;
    // 对应glVertexAttribPointer方法中的步长,也因此需提供getter(即GetStride)
public:
    VertexBufferLayout();

    inline const std::vector<VertexBufferElement> GetElements() const { return m_Elements; }
    inline unsigned int GetStride() const { return m_Stride; }

    template<typename T>
    void Push(unsigned int count);
    template<>
    void Push<float>(unsigned int count);
    template<>
    void Push<unsigned int>(unsigned int count);
    template<>
    void Push<unsigned char>(unsigned int count);
};
.cpp
#include "VertexBufferLayout.h"

#include <GL/glew.h>
#include <GLFW/glfw3.h>

unsigned int VertexBufferElement::GetSizeOfType(unsigned int type)
{
    switch (type)
    {
    case GL_FLOAT:
    case GL_UNSIGNED_INT:
        return 4;
    case GL_UNSIGNED_BYTE:
        return 1;
    }
    return 0;
}

VertexBufferLayout::VertexBufferLayout()
    :m_Stride(0) {}

// 以下是全特化模板的定义,据说有的编译器不支持把它和声明的文件分开,故建议放在头文件里
// 不过it works on my machine(
template<typename T>
void VertexBufferLayout::Push(unsigned int count) { }
template<>
void VertexBufferLayout::Push<float>(unsigned int count)
{
    m_Elements.push_back({ GL_FLOAT, count, GL_FALSE });
    m_Stride += count * VertexBufferElement::GetSizeOfType(GL_FLOAT);
}
template<>
void VertexBufferLayout::Push<unsigned int>(unsigned int count)
{
    m_Elements.push_back({ GL_UNSIGNED_INT, count, GL_FALSE });
    m_Stride += count * VertexBufferElement::GetSizeOfType(GL_UNSIGNED_INT);
}
template<>
void VertexBufferLayout::Push<unsigned char>(unsigned int count)
{
    m_Elements.push_back({ GL_UNSIGNED_BYTE, count, GL_TRUE });
    m_Stride += count * VertexBufferElement::GetSizeOfType(GL_UNSIGNED_BYTE);
}
然后在VertexArray类中添加一个方法来应用布局
void AddBuffer(const VertexBuffer& vb, const VertexBufferLayout& layout) const
{
    Bind();
    vb.Bind();
    const auto& elements = layout.GetElements();
    for (unsigned int i = 0, offset = 0; i < elements.size(); i++) {
        const auto& element = elements[i];
        glEnableVertexAttribArray(i);
        glVertexAttribPointer(i, element.count, element.type, element.normalized, layout.GetStride(), (const void*)offset);
        offset += element.count * VertexBufferElement::GetSizeOfType(element.type);
    }
}
Shader
在src文件夹下创建Shader类(Shader.cpp&Shader.h)
除开常见的构造、析构、绑定、解绑之外,这里需要注意的是让三角形动起来一节中提到的几个对标Unity(倒反天罡)的函数,开箱即用的现成方法也不少。
.h
#pragma once

#include <string>

struct ShaderProgramSource {
    std::string Vert;
    std::string Frag;
};

class Shader
{
private:
    unsigned int m_RendererID;
    std::string m_FilePath;
public:
    Shader(const std::string& path);
    ~Shader();

    void Bind() const;
    void Unbind() const;

    // Shader.PropertyToId(string)
    int GetUniformLocation(const std::string& name);

    // 有一堆形如glUniformXX(GLint, ...)的方法,这里按需添加相应函数即可
    void SetUniform1i(int location, int v0);
    void SetUniform2f(int location, float v0, float v1);
private:
    // 从main.cpp里面拿来就好了,基本不需要改动
    unsigned int CompileShader(unsigned int type, const std::string& source);
    unsigned int CreateShader(const std::string& vertexShader, const std::string& fragmentShader);
    ShaderProgramSource ParseShader(); // 只有这里的path被换成了m_FilePath
};
.cpp
#include "Shader.h"

#include <GL/glew.h>
#include <GLFW/glfw3.h>

#include <iostream>
#include <fstream>
#include <sstream>

Shader::Shader(const std::string& path)
    :m_RendererID(0), m_FilePath(path)
{
    ShaderProgramSource source(ParseShader());
    m_RendererID = CreateShader(source.Vert, source.Frag);
}

Shader::~Shader()
{
    glDeleteProgram(m_RendererID);
}

void Shader::Bind() const
{
    glUseProgram(m_RendererID);
}

void Shader::Unbind() const
{
    glUseProgram(0);
}

int Shader::GetUniformLocation(const std::string& name)
{
    int location = glGetUniformLocation(m_RendererID, name.c_str());
    if (location == -1)
        std::cout << "Warning: uniform \"" << name << "\" doesn't exist!" << std::endl;
    return location;
}

void Shader::SetUniform1i(int location, int v0)
{
    glUniform1i(location, v0);
}

void Shader::SetUniform2f(int location, float v0, float v1)
{
    glUniform2f(location, v0, v1);
}

unsigned int Shader::CompileShader(unsigned int type, const std::string& source)
{
    unsigned int id = glCreateShader(type);
    const char* src = source.c_str();
    glShaderSource(id, 1, &src, nullptr);
    glCompileShader(id);

    int result;
    glGetShaderiv(id, GL_COMPILE_STATUS, &result);
    if (result == GL_FALSE) {
        int length;
        glGetShaderiv(id, GL_INFO_LOG_LENGTH, &length);
        char* message = (char*)alloca(length * sizeof(char));
        glGetShaderInfoLog(id, length, &length, message);
        std::cout << "Fail to compile " <<
            (type == GL_VERTEX_SHADER ? "vertex" : "fragment")
            << "shader!" << std::endl << message << std::endl;
        glDeleteShader(id);
        return 0;
    }

    return id;
}

unsigned int Shader::CreateShader(const std::string& vertexShader, const std::string& fragmentShader)
{
    unsigned int program = glCreateProgram();
    unsigned int vs = CompileShader(GL_VERTEX_SHADER, vertexShader);
    unsigned int fs = CompileShader(GL_FRAGMENT_SHADER, fragmentShader);

    glAttachShader(program, vs);
    glAttachShader(program, fs);
    glLinkProgram(program);
    glValidateProgram(program);

    glDeleteShader(vs);
    glDeleteShader(fs);

    return program;
}

ShaderProgramSource Shader::ParseShader()
{
    std::ifstream fs(m_FilePath);
    std::stringstream ss[2];
    enum { None = -1, Vert = 0, Frag = 1 }type = None;
    std::string line;
    while (getline(fs, line))
        if (line.find("#shader") != std::string::npos)
            if (line.find("vert") != std::string::npos) type = Vert;
            else if (line.find("frag") != std::string::npos) type = Frag;
            else type = None;
        else ss[(int)type] << line << '\n';
    return { ss[0].str(),ss[1].str() };
}
假如我想通过一行shader.SetUniform2f("u_Offset", offset, 0)完成之前两行的效果,如何将这个重载实现得又快又好;或者说,假如我会多次查询同一个变量的id,如何保证后续查询的效率?
使用unordered_map<srting, int>做个缓存就好了
Renderer
在src文件夹下创建Renderer类(Renderer.cpp&Renderer.h)
这里和渲染相关的有glClear(GLbitfield(其实就是unsigned int))和draw call,可以把它们提取到Renderer中
.h
#pragma once

#include <GL/glew.h>
#include <GLFW/glfw3.h>

#include "IndexBuffer.h"
#include "VertexArray.h"
#include "Shader.h"

class Renderer
{
public:
    static void Clear(unsigned int target = GL_COLOR_BUFFER_BIT | GL_DEPTH_BUFFER_BIT);
    static void Draw(const VertexArray& va, const IndexBuffer& ib, const Shader& shader);
};
.cpp
#include "Renderer.h"

void Renderer::Clear(unsigned int target)
{
    glClear(target);
}

void Renderer::Draw(const VertexArray& va, const IndexBuffer& ib, const Shader& shader)
{
    shader.Bind();
    va.Bind();
    ib.Bind();
    glDrawElements(GL_TRIANGLES, ib.GetCount(), GL_UNSIGNED_INT, nullptr);
}
这个
Renderer中的方法都是静态的,其实也可以写成实例方法
应用
将各种.cpp文件里面的#include <GL/glew.h>与#include <GLFW/glfw3.h>替换成#include "Renderer.h",然后把main.cpp里面未封装的代码替换成封装好的代码,效果大致如下:
#include <iostream>

#include "Renderer.h"

int main(void)
{
    GLFWwindow* window;

    /* Initialize the library */
    if (!glfwInit())
        return -1;

    // 设置OpenGL版本
    glfwWindowHint(GLFW_CONTEXT_VERSION_MAJOR, 3);
    glfwWindowHint(GLFW_CONTEXT_VERSION_MINOR, 3);
    glfwWindowHint(GLFW_OPENGL_PROFILE, GLFW_OPENGL_CORE_PROFILE);

    /* Create a windowed mode window and its OpenGL context */
    window = glfwCreateWindow(640, 480, "Hello World", NULL, NULL);
    if (!window)
    {
        glfwTerminate();
        return -1;
    }

    /* Make the window's context current */
    glfwMakeContextCurrent(window);

    glfwSwapInterval(1); // 设置刷新速率

    if (glewInit() != GLEW_OK) // 初始化GLEW
        std::cout << "ERROR!" << std::endl;

    std::cout << glGetString(GL_VERSION) << std::endl; // 打印OpenGL版本以便调试

    glEnable(GL_DEPTH_TEST);
    glEnable(GL_BLEND);
    glBlendFunc(GL_SRC_ALPHA, GL_ONE_MINUS_SRC_ALPHA);

    float vertex[] = {
        -0.5f,  0.5f, 1, 0, 0,
        -0.5f, -0.5f, 0, 1, 0,
         0.5f, -0.5f, 0, 0, 1,
    }; // x, y, r, g, b
    std::unique_ptr<VertexBuffer> vb =
        std::make_unique<VertexBuffer>(vertex, sizeof(vertex), GL_STATIC_DRAW);

    VertexBufferLayout layout;
    layout.Push<float>(2);
    layout.Push<float>(3);

    std::unique_ptr<VertexArray> va = std::make_unique<VertexArray>();
    va->AddBuffer(*vb, layout);

    unsigned int index[] = {
        0, 1, 2,
    };
    std::unique_ptr<IndexBuffer> ib = std::make_unique<IndexBuffer>
        (index, sizeof(index) / sizeof(unsigned int), GL_STATIC_DRAW);

    std::unique_ptr<Shader> shader =
        std::make_unique<Shader>("res/shaders/Image.shader");

    /* Loop until the user closes the window */
    while (!glfwWindowShouldClose(window))
    {
        /* Render here */
        Renderer::Clear();

        Renderer::Draw(*va, *ib, *shader);

        static float offset = 0, increment = 0.02f;
        offset += increment;
        if (offset > 0.5f || offset < -0.5f) increment = -increment;

        static int offsetLocation = shader->GetUniformLocation("u_Offset");
        shader->SetUniform2f(offsetLocation , offset, 0);

        /* Swap front and back buffers */
        glfwSwapBuffers(window);

        /* Poll for and process events */
        glfwPollEvents();
    }

    glfwTerminate();
    return 0;
}
显示一张图片
画一个矩形
准备一个平平淡淡才是真的shader,将它命名为Image.shader
#shader vert
#version 330 core

layout(location = 0) in vec4 position;

uniform vec2 u_Offset;

void main(){
    gl_Position = position + vec4(u_Offset, 0, 0);
}

#shader frag
#version 330 core

out vec4 o;

void main(){
    o = vec4(1, 1, 1, 1);
}
vertex数组暂时只需包含四个顶点的xy:
float vertex[] = {
    -0.5f,  0.5f,
    -0.5f, -0.5f,
     0.5f, -0.5f,
     0.5f,  0.5f,
}; // x, y
index数组则需添加矩形另一半三角形的索引
unsigned int index[] = {
    0, 1, 2,
    2, 3, 0,
};
删除原先用于rgb的layout.Push<float>(3);
把初始化shader的字符串换成"res/shaders/Image.shader"
效果如下:
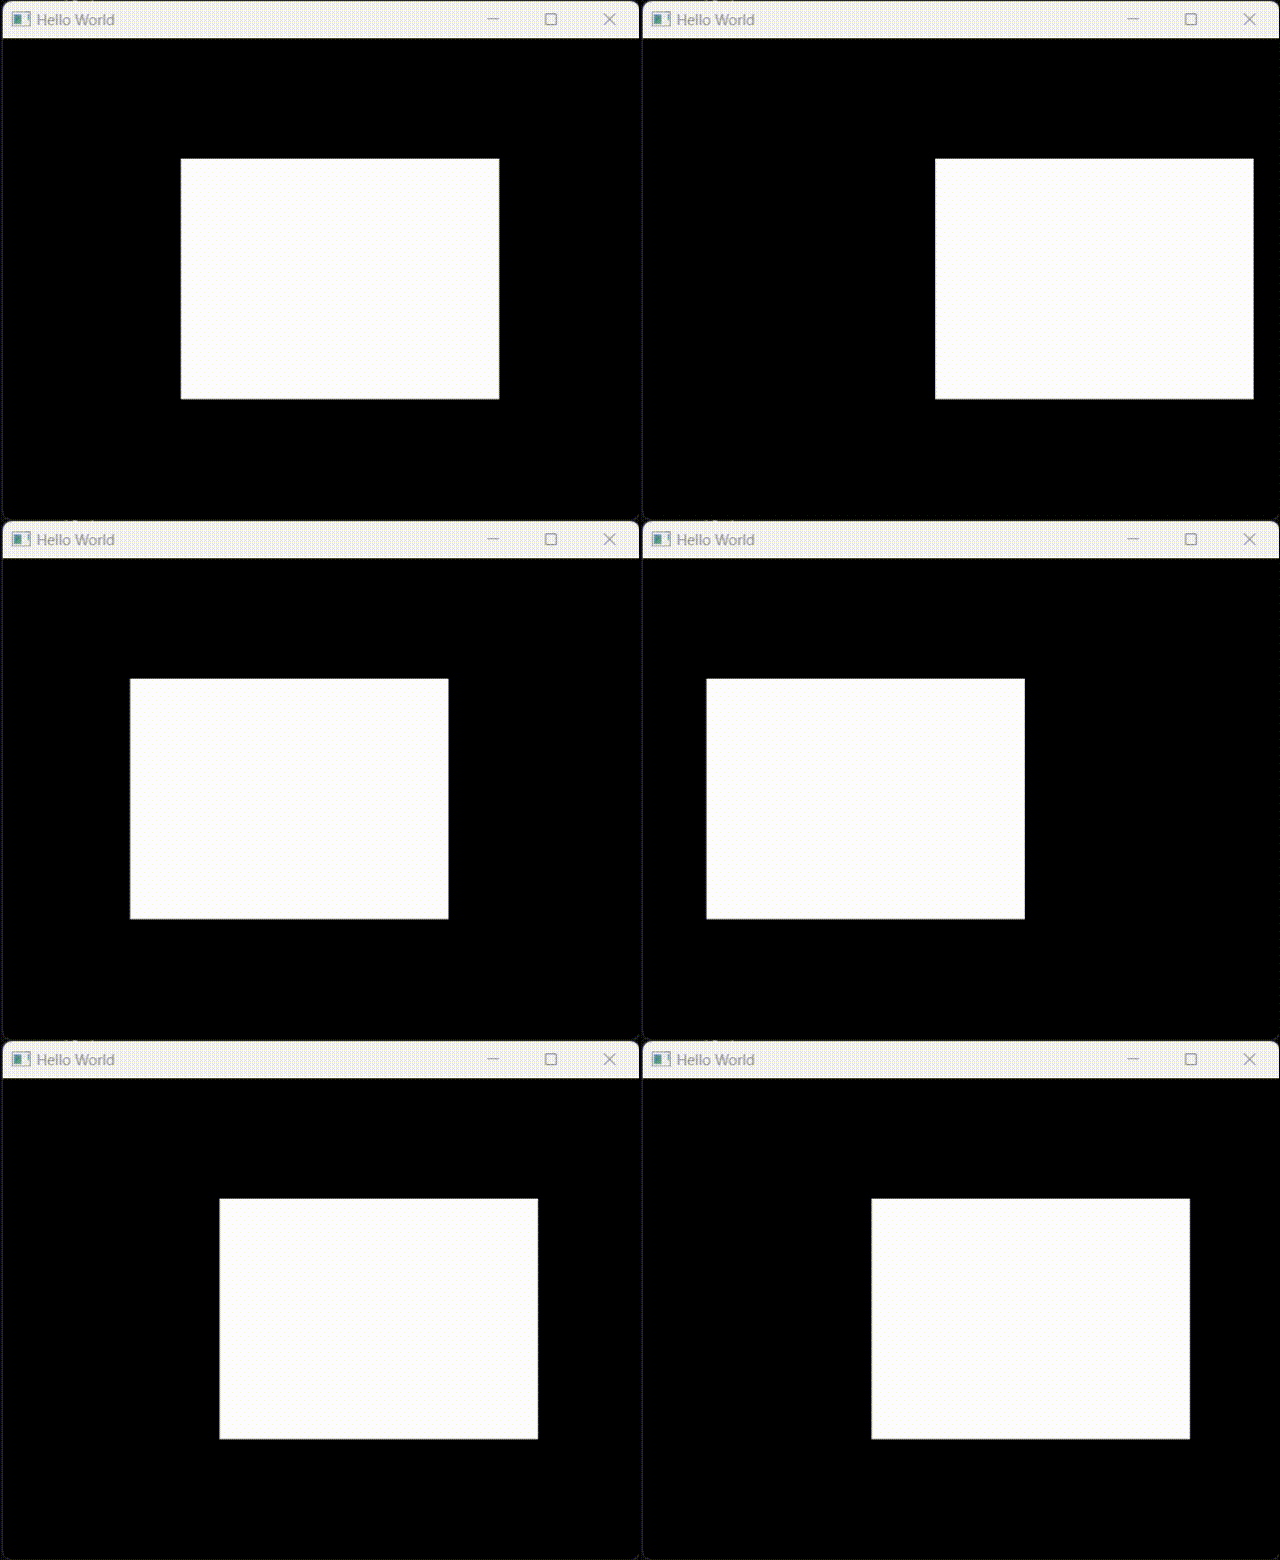
stb_image
https://github.com/nothings/stb/blob/master/stb_image.h
下载stb_image.h,在3rdparty文件夹下创建stb_image文件夹,把stb_image.h放进去,创建stb_image.cpp,内容如下:
#define STB_IMAGE_IMPLEMENTATION
#include "stb_image.h"
右键单击项目->属性->配置属性->C/C++->常规->附加包含目录->添加3rdparty
右键单击该文件夹,将它们包含在项目中
Texture
在src文件夹下创建Texture类(Texture.cpp&Texture.h)
接下来介绍几个函数:
-
stbi_set_flip_vertically_on_load(int flag_true_if_should_flip)
- flag_true_if_should_flip:非0则垂直翻转图片
对于一张图片的uv坐标,OpenGL以左下角为(0, 0),而加载图片时可能会从上往下加载,这意味着左上角为(0, 0),故y轴可能颠倒。此时就需要翻转图片。
-
stbi_load(char const *filename, int *x, int *y, int *comp, int req_comp)
- filename:文件路径
- x:图片宽度
- y:图片高度
- comp:图片颜色通道数
- req_comp:预期颜色通道数
我们希望读取到RGBA四个通道,所以通常设置为4
- 返回读取到的内容,虽然具体是什么不清楚,但是OpenGL能用(
-
glTexParameteri(GLenum target, GLenum pname, GLint param) 一个设置纹理各种处理细节的函数,有兴趣可以参阅https://registry.khronos.org/OpenGL-Refpages/gl4/html/glTexParameter.xhtml
-
glTexImage2D (GLenum target, GLint level, GLint internalformat, GLsizei width, GLsizei height, GLint border, GLenum format, GLenum type, const void *pixels)
- target:参考
glTexParameteri的同名参数 - level:level of detail,这里设置为0
- border:一图胜千言:
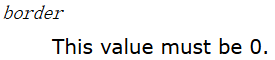 我不理解为什么会给这样一个参数
 - 其余参数可参阅https://registry.khronos.org/OpenGL-Refpages/gl4/html/glTexImage2D.xhtml
- target:参考
-
glActiveTexture(GLenum texture)
- texture:激活材质槽位,可填
GL_TEXTURE0~GL_TEXTURE31,移动端往往只有8个孔位;不过这里暂不需要担心槽位不够。由于GL_TEXTURE0~GL_TEXTURE31与0x84C0~0x84DF一一对应,指定第slot个槽位其实只需要填写GL_TEXTURE0 + slot。
- texture:激活材质槽位,可填
.h
#pragma once

#include <string>

class Texture
{
private:
    unsigned int m_RendererID;
    std::string m_FilePath;
    unsigned char* m_LocalBuffer;
    int m_Width, m_Height, m_BPP;
public:
    Texture(const std::string& path, bool flip);
    ~Texture();

    void Bind(unsigned int slot = 0) const;
    void Unbind() const;

    inline int GetWidth() const { return m_Width; }
    inline int GetHeight() const { return m_Height; }
};
.cpp
#include "Texture.h"

#include "Renderer.h"

#include <stb_image/stb_image.h>

Texture::Texture(const std::string& path, bool flip)
    : m_RendererID(0), m_FilePath(path), m_LocalBuffer(nullptr)
    , m_Width(0), m_Height(0), m_BPP(0)
{
    stbi_set_flip_vertically_on_load(flip);
    m_LocalBuffer = stbi_load(path.c_str(), &m_Width, &m_Height, &m_BPP, 4);

    glGenTextures(1, &m_RendererID);
    Bind();

    // 图像放大缩小均采用线性过滤方式
    glTexParameteri(GL_TEXTURE_2D, GL_TEXTURE_MIN_FILTER, GL_LINEAR);
    glTexParameteri(GL_TEXTURE_2D, GL_TEXTURE_MAG_FILTER, GL_LINEAR);
    // 图形包围方式设置为重复(平铺)
    glTexParameteri(GL_TEXTURE_2D, GL_TEXTURE_WRAP_S, GL_REPEAT);
    glTexParameteri(GL_TEXTURE_2D, GL_TEXTURE_WRAP_T, GL_REPEAT);

    glTexImage2D(GL_TEXTURE_2D, 0, GL_RGBA8, m_Width, m_Height, 0, GL_RGBA, GL_UNSIGNED_BYTE, m_LocalBuffer);
    glGenerateMipmap(GL_TEXTURE_2D); // 生成mipmap

    if (m_LocalBuffer) stbi_image_free(m_LocalBuffer);
}

Texture::~Texture()
{
    glDeleteTextures(1, &m_RendererID);
}

void Texture::Bind(unsigned int slot) const
{
    glActiveTexture(GL_TEXTURE0 + slot);
    glBindTexture(GL_TEXTURE_2D, m_RendererID);
}

void Texture::Unbind() const
{
    glBindTexture(GL_TEXTURE_2D, 0);
}
应用
首先,在res文件夹下创建textures文件夹,在里面放一张图片。
我使用的是下面这张:

由于图片中的人物叫时坂琉璃,我将这张图片命名为tokisaka_ruri.png
其次是Image.shader,现在它需要知道它应该采样纹理的哪个坐标,还需要一个uniform变量来指定采样第几张纹理:
#shader vert
#version 330 core

layout(location = 0) in vec4 position;
layout(location = 1) in vec2 texCoord;

uniform vec2 u_Offset;

out vec2 v_TexCoord;

void main(){
    gl_Position = position + vec4(u_Offset, 0, 0);
    v_TexCoord = texCoord;
}

#shader frag
#version 330 core

in vec2 v_TexCoord;

uniform sampler2D u_Texture;

out vec4 o;

void main(){
    o = texture(u_Texture, v_TexCoord);
    // 采样图片某一坐标上的颜色,得到的是个vec4变量
}
然后是vertex数组,现在它需要给shader传输顶点的uv坐标:
float vertex[] = {
    -0.5f,  0.5f, 0, 1,
    -0.5f, -0.5f, 0, 0,
     0.5f, -0.5f, 1, 0,
     0.5f,  0.5f, 1, 1,
}; // x, y, u, v
相应的,layout也应该再Push两个float数据进去
在shader附近应用Texture,并设置uniform变量:
std::unique_ptr<Texture> texture = std::make_unique<Texture>("res/textures/tokisaka_ruri.png", true);
std::unique_ptr<Shader> shader = std::make_unique<Shader>("res/shaders/Image.shader");

int textureLocation = shader->GetUniformLocation("u_Texture");
shader->SetUniform1i(textureLocation, 0);
还能把窗口大小从(640, 480)调成(960, 540),不然比例不对
效果如下: